Adaptive Cards with Microsoft Teams with Examples
 Sunday, October 31, 2021
- By : Mike Maadarani
 0 comment
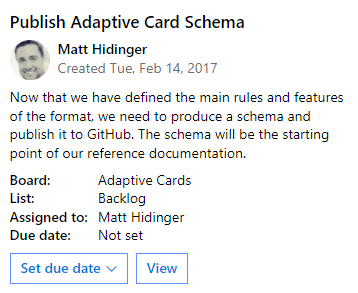
What are Adaptive Cards? Adaptive Cards allows you to focus on the layout and content of what you want to share and how it is to be organized, such as using images, columns, tables, etc. It does not focus on how it is displayed on a device and is unconcerned about the browser that is being used. Adaptive Cards are platform-agnostic and can be exchanged openly between apps and services as they are authored in JSON format. The display of the content is the responsibility of the host application where it controls color, buttons, backgrounds, fonts, and specific parts of the layout. When the Adaptive Card is delivered to a specific app, such as Microsoft Teams, the JSON converts to the native UI and automatically adapts to its hosts. Once the card is displayed, it appears as another user interface.
What can Adaptive Cards be used for?
There are several scenarios where Adaptive Cards can be leveraged to increase user engagement. You can:
- Notify Users: by providing an interactive card that encourages the user to take additional information or continue to enact actions. Bots are a great example of this as they can provide information such as weather or travel, confirm reservations, and alleviate the load of repetitive tasks. Chat or conversation bots will engage your user through text, task modules, and interactive cards. Conversation bots are extremely flexible as they can manage basic commands to complex tasks through the use of natural language processing and AI.
- Collect Feedback: by providing polls and surveys, you can gather feedback to obtain the data that you seek. The polls and surveys can be highly interactive with bots that provide questions and answers, engaging the user to click or provide text which will cause the next step in the conversation.
- Interactions: by resolving single request or response cycles with results that are meaningful to multiple members of the conversation.
- Social/Fun Bots: by leveraging bots to increase engagement in social activities, including random winner draws, retrieving fun images, games, daily jokes, etc.
- One-to-One Chat: by enabling bots that can answer Q&A, initiate workflows in other systems, take notes, and many other tasks, workloads are greatly diversified.
Samples of Adaptive Cards for Microsoft Teams
This is exciting as these select samples and templates have been created and are offered in Microsoft Teams to show what you can create. These can be copied, edited, and tweaked to create any possible scenario. There are limitless scenarios to design and create.
Activity Update and Activity Update with Labels
Calendar Reminder and Calendar Reminder with Labels: displays a message reminding the user of a calendar appointment.
Image Gallery
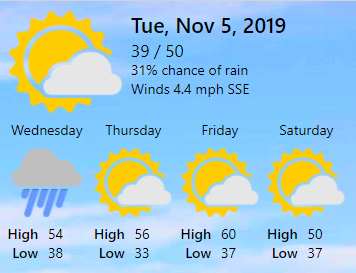
Weather Compact
Weather Large
Product Video: imbed multi-media assets in Adaptive Cards.
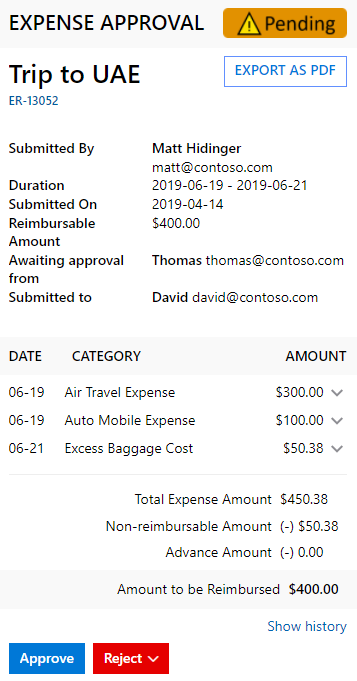
Expense Report and Expense Report with Labels
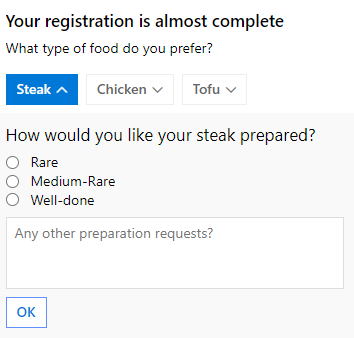
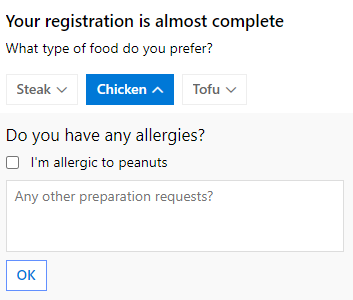
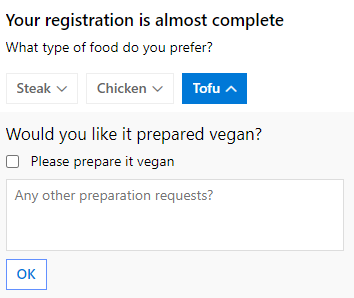
Show Card Wizard: using Adaptive Cards, create a wizard-like user interface.
Food Order and Food Order with Validation: a sample of how a menu selection can be created with an Adaptive Card
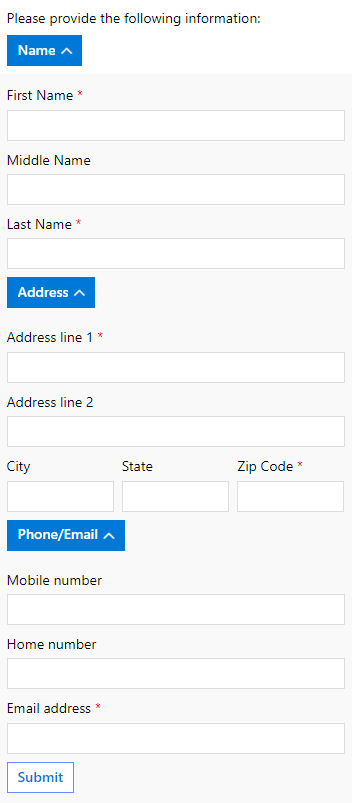
Input Form and Input Form with Labels
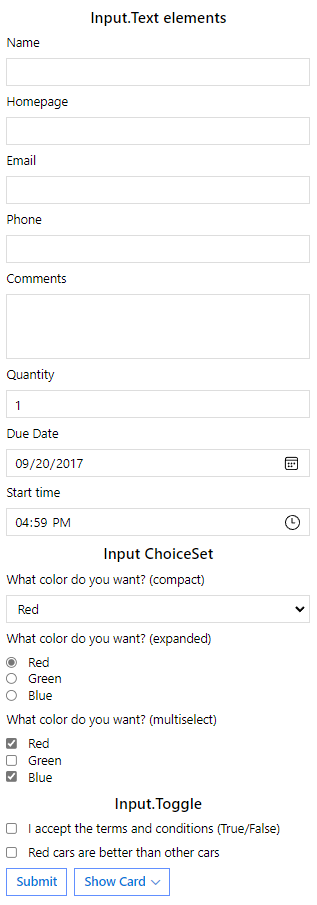
Inputs and Inputs with Validation
Restaurant
Sporting Event
Stock Update
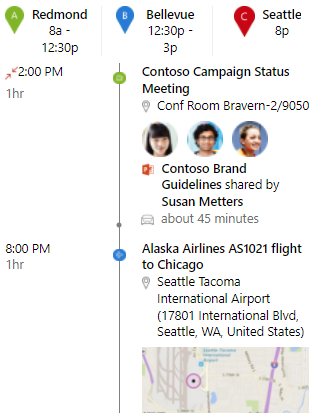
Agenda
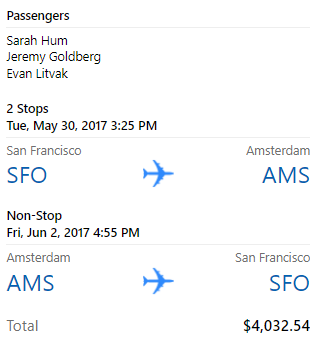
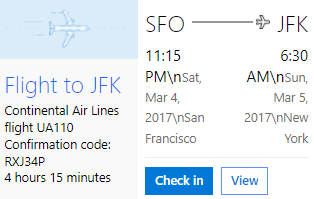
Flight Itinerary: used in a booking application and will list information related to booking flights including a list of flights, cost, and passengers.
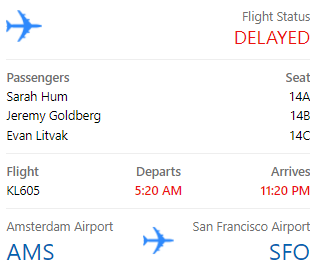
Flight Update: displays a list of flights, flight status, and passengers.
Flight Details
Simple Fallback
Adaptive Cards and Flow for Microsoft Teams
When an instant flow button is integrated with an Adaptive Card, collaboration and engagement in Microsoft Teams are instantaneous. There are several instances where Flow can be leveraged with an Adaptive Card, and the following examples explore these possibilities.
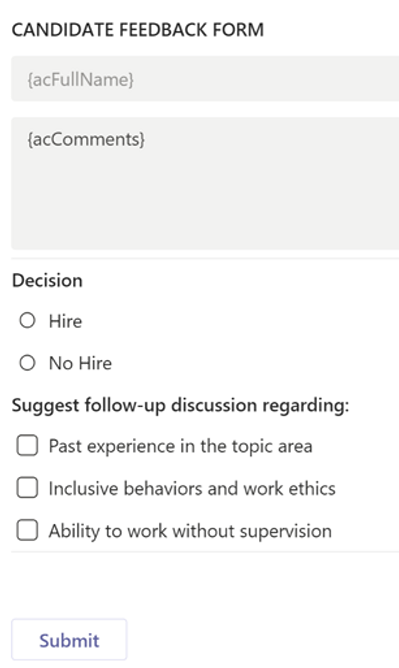
Candidate Feedback
Image Share: designed for sharing photos in a display-only mode. Photos are shared from posted images on SharePoint and are undergoing completion processes related to compliance, audits, and inspection.
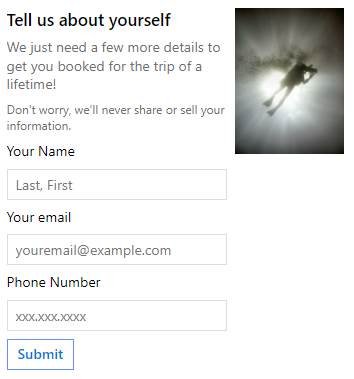
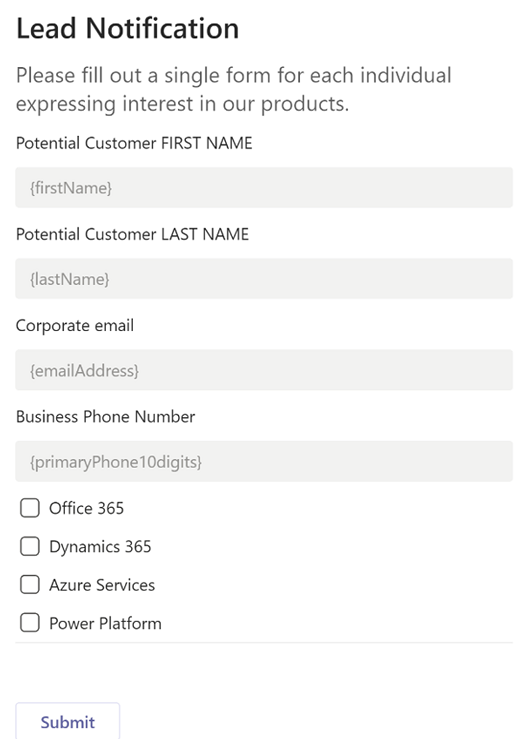
Lead Collection: this is an input form created to collect information of potential clients that is completed by the user and submitted.
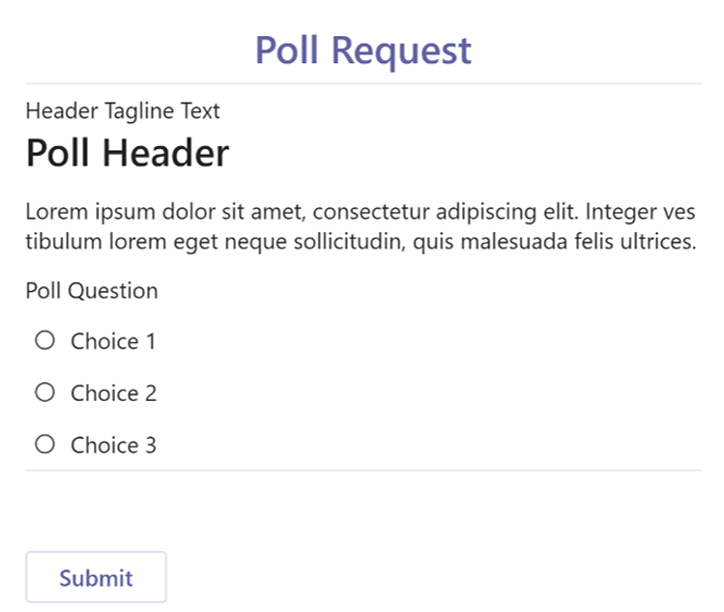
Poll Generator: this is an input form for polling and it will provide different decision paths to the recipient that are based on voting counts or poll values.
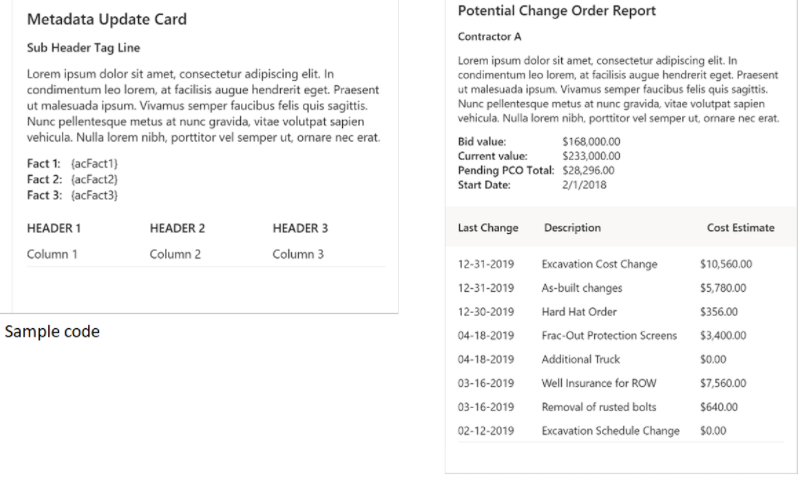
Metadata Update: This is a display Adaptive Card, but input fields can be added if one of the Wait for response actions is used to create it. This Adaptive Card enables flow makers to update and notify Teams members or channels with metadata related to files, records, or topics. This card consists of three sections: the topic header (contains the header, sub-header, and a description), fact list area (shows relevant row metadata), and column set (supports a table array of data).
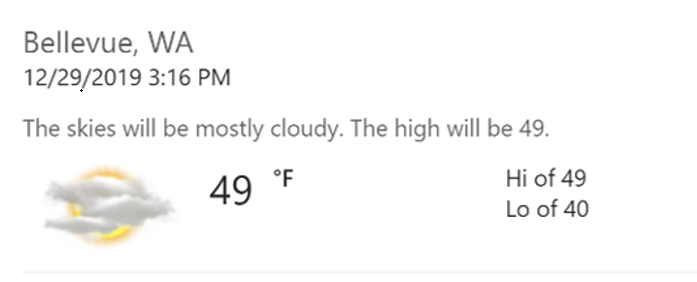
Daily Weather: designed to post daily weather updates to a Teams channel in conjunction with MSN weather.
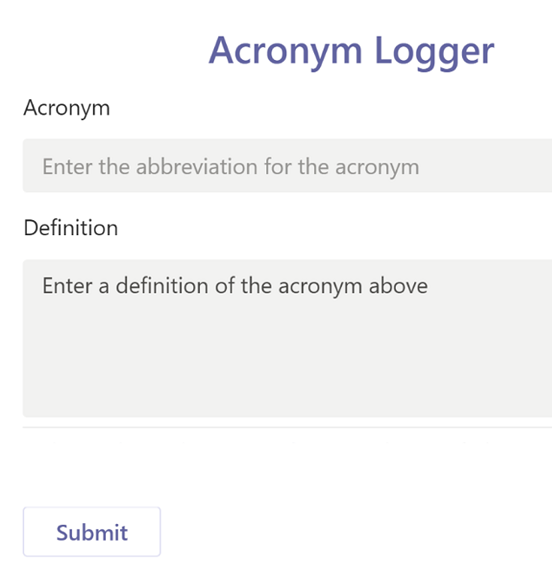
Acronym Form: this is an Adaptive Card leveraging an input form to collect data on acronym usage and is stored in the Dataverse and can be queried from anywhere as this is an ongoing project of data collection.
Images and Media: Microsoft.com
Adaptive Cards are a vehicle to design and integrate lightweight UI for all major frameworks and systems including Android, iOS, Windows, ReactNative, JavaScript, ASP.NET, and .NET WPF. Adaptive Cards provide process designers the ability to achieve consistent UI patterns whenever there is a need to display information as a part of the business automation or process.
Microsoft Teams: Breakout Rooms and Administration
 Saturday, October 02, 2021
- By : Mike Maadarani
 0 comment
In the previous article, Microsoft Teams: Breakout Rooms, we discussed how and what Breakout Rooms are and how important they are for the Microsoft Teams collaborative platform. But how does Microsoft Teams Breakout Rooms work?
The organizer of the meeting is the administrator who has control of this feature. Once the organizer joints the meeting, then he/she can divide the larger video or audio group into smaller discussion groups, up to 50 Breakout Rooms, thereby making these smaller discussion groups more effective with brainstorming, collaborating, and advancing towards solutions.
The organizer can also pre-create the breakout rooms ahead of joining the meeting and configure all the settings so he/she does not have to do during the meeting.
The administrator can add, remove, name, and rename the rooms and can also assign users to a room, open or close the room multiple times during the session and move participants between rooms. Upon joining a session, the administrator is muted, though unmuting will allow the administrator to participate in that session. Important to note is that Microsoft Teams Breakout Rooms management can only be created through Teams Client while participants can join via desktop, web or mobile.
Creating, Naming, and Starting Breakout Rooms
To start, schedule the meeting in Microsoft Calendar by creating a New Meeting or start the meeting in a Teams Chanel with Meet Now. Then add your attendees (your participants) and:
1. Join your meeting at the scheduled time. Upon joining, a new window will pop up;
2. Wait for your attendees to join. Once they have joined, you can proceed to create your Breakout Room;
3. Select Breakout Rooms from your meeting controls;
4. Choose from the dropdown menu the number of Breakout Rooms you want to create and whether you want to assign the attendees to each room manually or automatically. This is the only time you will be able to assign automatically.
To add participants manually:
a. Expand the Assign Participants list;
b. Hovering over each participant will bring up checkboxes. Check the checkbox if you want to add this participant to a Breakout Room;
c. Select the More option and choose the room from the list. This will assign the participant to the Breakout Room;
d. Repeat steps b and c until all participants have been assigned;
e. To see which participants are assigned to a Breakout room, locate the arrow next the room’s name. Click and expand this arrow and the names of the assigned participants will appear;
To add participants automatically, simply choose the option to do so. In order for this option to work, participants will have to have been pre-emptively assigned to the Breakout Rooms;
5. Name the Breakout Rooms to reflect the discussion such as project name so it is easily identifiable and a reminder for participants. If you need to rename the Breakout Room, then choose the More Options next the room. Then choose Rename Room, key in the new name of the Breakout Room, and save by selecting Rename Room;
6. Starting Breakout Rooms can be done individually on a room to room basis, or you can start all Breakout Rooms at the same time. To start them individually, then choose the More Options next to the Breakout Room name. Next choose Open Room. The Breakout Room is now opened. To open them en masse, select Open Rooms. The room status from closed to open will appear as Open to confirm that the Breakout Room is now opened.
There are many benefits for implementing Microsoft Teams Breakout Rooms ranging from organizing large groups into smaller and manageable clusters to providing a platform that supports users that are working remotely and in person with the main objective of providing easy maneuverability, flexible accessibility, numerous personnel meeting scalability, and collaborative stability.
Administration of Breakout Rooms
As the administrator and organizer of the meeting, you have several abilities in relation to the Breakout Rooms:
1. Join a Breakout Room: to check on a Breakout Room’s progress, select More Options next to the room name. Then, select Join Room to join. Ready to leave? Select Return and you will leave the Breakout Room and join back into the main meeting;
2. Send an Announcement to the Breakout Rooms: provide prompts or time updates through an announcement. To send an Announcement after the meeting starts, select More Options and then Make an Announcement. Key in your announcement and then choose Select. Your announcement will appear in the chat for all participants, and they will be alerted with a notification that it is there;
3. Reassign Participants: move participants individually to different Breakout Rooms but note that this function can only currently be performed when the Breakout Rooms are closed. In the Breakout Room, expand the list of participants. A checkbox will appear as you hover over the participant’s name. Check this checkbox. Next, select the More Options and the Breakout Room name that you would like to reassign the participant to. Check the checkbox of the re-assigned Breakout Room, and your participant has now been re-assigned;
4. Chat with Breakout Room Participants: as with regular meetings, the administrator and participants will be able to access from the chats list and
from Chat, the Breakout Room’s chat. Participants will only see and access chat from their assigned Breakout Room, whereas the administrator can see and access all Breakout Room chats. Administrators will add the participant at the Breakout Room is opened and participants will automatically be removed from the chat if they are re-assigned to another Breakout Room or when the room is closed. The chat history and shared files will still be accessible to participants even after the Breakout Room is closed;
5. Add or Delete Breakout Room: additional Breakout Rooms can be added by choosing Add Room, keying in the room name, confirming, and then adding the participants. Deleting a Breakout Room can be done by selecting More Options next the room, and then choosing Delete Room. The Breakout Room is now deleted;
6. Close Breakout Rooms: close Breakout Rooms individually by selecting More Options next the room name, and then Close Room. To close Breakout Room en masse, select Close Rooms. The status of the rooms will now change from Open to Closed. Once all participants are out of their Breakout Rooms, choose Resume and all participants will be back in the general, larger, main meeting group.
7. Save Notes, Recordings, and Files from Breakout Rooms: these materials can be accessed in the Breakout Room’s chat, during and after the closure of the Room. However, the ability to add additional materials or continue to chat will not be possible once the Room is closed; and
8. Edit Breakout Room Settings: participants are automatically moved into open rooms as a default setting. This setting can be changed by selecting More Options, then Room Settings. Next, check on the Automatically Move check box to de-select participants. If the default setting is de-selected, then participants will receive a message to join a Breakout Room, which they must choose by selecting Join before being moved.
Microsoft Teams is evolving quickly as it adapts and flexes with the needs of its users, whether remote, onsite, or a hybridization of the two. The ability to create, monitor, and delete Breakout Rooms provides the flexibility that many users and corporations need for collaboration, communication, and project management. With Microsoft Teams Breakout Rooms, collaboration has become that much easier.
Microsoft Teams: Breakout Rooms as User
 Friday, October 01, 2021
- By : Mike Maadarani
 0 comment
For some, life may have felt like it has been on a hold pattern during this pandemic but at Microsoft, they have been anything but on a hold pattern. They’ve been busy planning, strategizing, creating, designing, testing, and finalizing new features for many of their platforms, including Microsoft Teams.
Microsoft Teams is the interface and platform for users within a corporation and their external clients to collaborate. Communications between team members and clients is smoother, easier, and more accessible because of Microsoft Teams. There are many new features being added, but the most anticipated, and possibly the biggest game changer, is Microsoft Teams Breakout Rooms.
Similar to large in-person conferences and conventions, virtual team meetings can range from two participates to upwards of hundreds that gather in one large venue. Within this large venue, areas are broken down into zones. Within these zones will be kiosks or spaces, like rooms, that have specialized vendors, consultants or where specific types of training will take place. Microsoft Teams Breakout Rooms are similar in that they provide a virtual space for smaller groups of people to gather, holding discussions on similar topics, or maybe one topic, brainstorm, and reach solutions.
How the administration and creation of the Breakout Rooms in Microsoft Teams is managed is explained in the following article, Microsoft Teams Breakout Rooms and Administration.
On the participant side, they will be able to chat in the Breakout Room and share content from Whiteboards and PowerPoint. The chat will only be visible for participants in that particular Breakout Room and only they can participate in the chat, with the exception of the Administrator who is able to access and participate in all Breakout Rooms. Participants are not able to move freely between Breakout Rooms or the main meeting. They must wait until the administrator adds them back to the main meeting or re-assigns them to another Breakout Room. The participant, can however, request the administrator contact them.
What can participants do in the Breakout Room?
As part of the new features being added to Microsoft Teams Breakout Rooms, managers that are selected and assigned to rooms by the administrator will now be able to manage rooms, open or close rooms, customize Microsoft Teams meeting settings, and set timers.
New features and abilities for participants include pinning a video on the front page of the Teams meeting, which will appear next to those of other participants.
Another highlight is the ability to turn off the self-view. This can be done from the meeting settings which will hide their own video preview, which appears on the bottom right of the meeting screen by default.
Tips, Tricks, and Suggestions for Breakout Rooms
As with any meeting or any interaction, it is best to be prepared to avoid any last-minute trouble that will impact the meeting.
If you ask any professional administrative assistant, they will tell you having a dry run is vital in ensuring a smooth, and trouble-free meeting. Having materials prepared ahead of time and distributed to the attendees so they can prepare in advance will not only help them understand the agenda, but this will save time once they are assigned to their Breakout Rooms as they immediately dive into the task at hand.
As you prepare to break the large group into smaller groups, delegate responsibilities, including assigning a group leader or room manger who is responsible for monitoring the chat to capture announcements and inform the group of these announcements and is the lead on monitoring chat activity. Having announcements prepared beforehand will help the administrator to deliver these effortlessly, on time, and clearly. Additionally, the administrator could provide a link to documents those participants may need access to for collaborating in their Breakout Room.
Another beneficial tip is to make an announcement at the beginning of the session indicating when the session wraps up, and then five minutes before the wrap up time, send a warning announcement so the participants can begin their preparations for ending their session.
Microsoft Teams is evolving quickly as it adapts and flexes with the needs of its users who are comprised of users who are remote, onsite, or a combination of remote and onsite. With Microsoft Teams Breakout Rooms, meetings that involve numerous people can now be held as one large meeting with smaller discussion that focus on specific topics that make up the whole of the project. Coming back together in the main meeting, participants can share their findings and proposals after brainstorming in the smaller groups. Microsoft Teams Breakout Rooms provides efficient, simplified, and real-time collaboration.
Archives
- December 2024
- November 2023
- October 2023
- September 2023
- August 2023
- January 2023
- November 2022
- October 2022
- May 2022
- March 2022
- January 2022
- December 2021
- November 2021
- October 2021
- March 2021
- October 2020
- September 2020
- July 2020
- March 2020
- February 2020
- January 2020
- December 2019
- November 2019
- October 2019
- September 2019
- June 2019
- May 2019
- March 2019
- February 2019
- January 2019
- December 2018
- November 2018
- October 2018
- September 2018
- August 2018
- July 2018
- June 2018
- May 2018
- April 2018
- March 2018
- February 2018
- January 2018
- December 2017
- November 2017
- October 2017
- August 2017
- July 2017
- June 2017
- May 2017
- March 2017
- February 2017
- January 2017
- October 2016
- September 2016
- August 2016
- July 2016
- June 2016
- May 2016
- March 2016
- February 2016
- January 2016
- September 2015
- August 2015
- July 2015
- June 2015
- April 2015
- February 2015
- January 2015
- November 2014
- October 2014
- September 2014
- November 2013
- July 2013
- February 2013
